
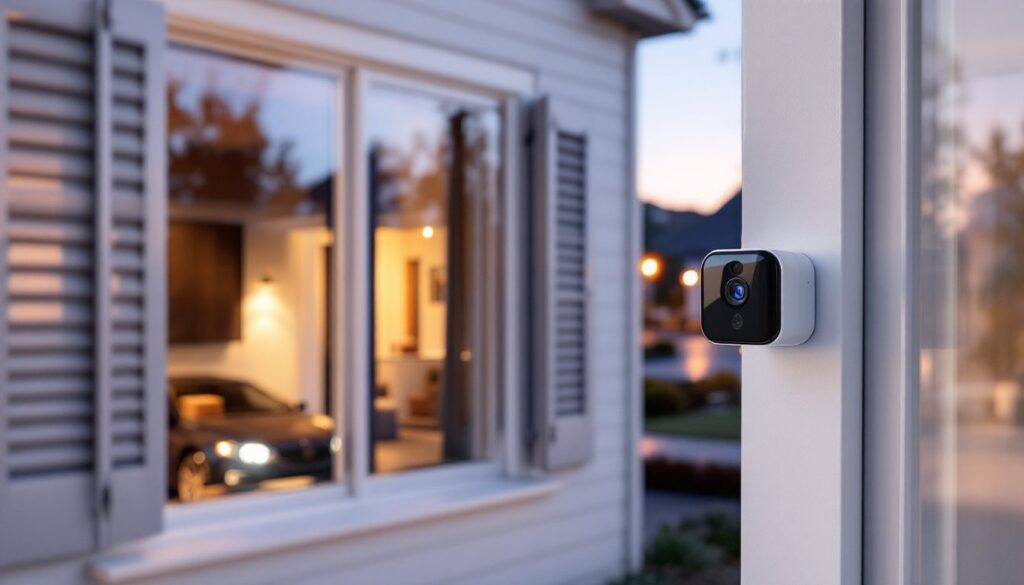
Window security cameras have become a practical necessity for homeowners looking to monitor their property with minimal effort. Whether you’re concerned about package theft, break-ins, or simply want to keep an eye on your front entrance, a window security camera offers surveillance without the permanent installation headaches of traditional systems. Unlike exterior-mounted options, these cameras blend into your home’s existing window frames, providing reliable protection while maintaining your home’s appearance. With advancements in wireless technology and night vision, finding the best window security camera for your needs has never been more straightforward.
Table of Contents
ToggleKey Takeaways
- A window security camera provides flexible, non-permanent surveillance without complex wiring, making it ideal for monitoring package theft, break-ins, and home entrances while maintaining your home’s appearance.
- Prioritize night vision capability and reliable connectivity over raw resolution—1080p with a 120-degree field of view is sufficient for most homeowners, while infrared performance should be tested with actual footage before purchase.
- Wireless window security cameras eliminate cable management headaches and are ideal for renters, though they require battery maintenance every 2–6 months, whereas wired models offer maintenance-free continuous power.
- Strategic camera placement covering blind spots like side yards and back patios outperforms a higher-resolution camera placed in predictable locations, so position mounts at eye level to capture facial features effectively.
- Choose mounting hardware carefully—adhesive strips weaken in 6–12 months under direct sun, while brackets with silicone adhesive or stainless steel screws provide longer-lasting durability and easier repositioning.
Why Window Security Cameras Matter for Modern Homeowners
Modern homeowners face a unique set of security challenges. Package theft, vehicle break-ins, and unwanted trespassers are increasingly common concerns, especially in suburban neighborhoods. A window security camera gives you visibility into the areas around your home without requiring you to step outside or install complex wiring through walls.
Unlike traditional security systems, window-mounted cameras are flexible and non-permanent. You can reposition them based on seasonal changes, shifting traffic patterns, or evolving security priorities. An indoor window security camera placed strategically near your front door, driveway, or back patio gives you real-time monitoring without the commitment of hardwired infrastructure.
The psychological deterrent factor matters too. Visible cameras signal to potential intruders that your home is monitored, often sending them looking elsewhere. Most break-ins succeed because they’re easy targets, a clearly visible window camera shifts that equation in your favor.
Key Features to Look For When Choosing a Window Security Camera
Not all window cameras deliver the same level of protection. Understanding core specifications helps you pick a model that actually suits your needs rather than just buying the cheapest option available.
Resolution and Video Quality
Resolution is your first consideration. Most modern window mounted security cameras start at 1080p (Full HD), which captures enough detail to identify a person’s face from about 8–10 feet away. 2K or 4K cameras offer superior clarity and wider viewing angles, but they also demand more storage and bandwidth if you’re using cloud recording.
For monitoring package deliveries or identifying intruders, 1080p is genuinely sufficient in most situations. You’re more likely to benefit from a wider field of view, ideally 120 degrees or more, than raw megapixels. A 120-degree field captures both approaching figures and vehicle details, giving you context that a narrow 60-degree view misses.
Look for cameras with dynamic range adjustment or HDR (High Dynamic Range) if your windows get strong sunlight. This prevents the camera from washing out bright areas while crushing shadow detail, a common problem with budget models facing uneven lighting.
Night Vision and Low-Light Performance
Night vision separates genuinely useful cameras from decorative ones. There are two main approaches: infrared (IR) LEDs and color night vision with enhanced low-light sensors.
Infrared cameras produce crisp black-and-white video in complete darkness, with effective ranges typically between 20–30 feet. The trade-off is that the image lacks color context, which matters when you’re trying to describe a suspect’s clothing to authorities.
Color night vision cameras use larger sensors and wider apertures to gather available light (streetlights, porch lights, moonlight), producing grayscale or low-saturation color video. These cameras preserve clothing colors and vehicle details better than IR, though they require adequate ambient light, pure darkness still defeats them.
For a window camera, IR makes practical sense. Your window receives exterior light from streetlights or porch fixtures, and the IR supplementation handles gaps when that light fades. Test the camera’s night performance before committing: look for actual footage samples, not just marketing claims. Poor night performance ruins otherwise solid cameras.
Installation Options: Wired vs. Wireless Window Cameras
Your installation choice affects reliability, power management, and long-term hassle. Both approaches work for windows, but they solve different problems.
Wireless window cameras connect via WiFi and run on rechargeable batteries or AA batteries. Setup is straightforward, mount the camera to your window frame with adhesive strips or small brackets, and pair it with your phone app. No drilling, no running cables, no electrician required. The downside is battery maintenance: you’ll recharge or swap batteries every 2–6 months depending on motion detection frequency and recording quality. Wireless models are ideal for renters or if you want to avoid any permanent home modifications.
Wired cameras plug into power (typically via a USB-C or proprietary cable) and use Ethernet or WiFi for connectivity. They never lose power unless your outlet does, making them more reliable for continuous surveillance. They’re slightly bulkier and require you to route a power cable near the window, either through a window frame corner or along the wall trim, but once installed, they’re essentially maintenance-free.
For window mounting specifically, wireless models shine because running cables to an exterior-facing window creates visible eyesores and potential weather exposure. If your window is near an outlet and you don’t mind the cable, a wired model offers superior reliability. Most homeowners choose wireless for windows because the battery swap trade-off beats the cable management headache.
Best Practices for Positioning and Mounting Window Cameras
Where you place your window camera matters far more than the camera’s specs. A perfectly positioned 1080p camera outperforms a poorly placed 4K model.
Choose the right window. Front-facing windows near doors are natural choices, but they’re also where owners place cameras predictably. Burglars know this and may approach from sides or the rear. Position at least one camera to cover areas that criminals might assume are blind spots, side yards, back patios, or garage approaches. Studies on security camera blind spots reveal that most unsuccessful break-in attempts happen where homeowners neglect coverage.
Mount at eye level or slightly higher. A camera mounted 5–7 feet high captures facial features effectively and avoids people walking directly past it without triggering video. Avoid mounting too high (roofline level), which captures the top of heads but misses faces. Too low invites deliberate blocking or tampering.
Avoid backlighting. Don’t place a camera facing directly into bright sunlight or streetlights, even if the camera has HDR. The glare overwhelms sensors. Position it so exterior light comes from the side or behind the camera.
Check your field of view. Most cameras offer 110–130 degrees. Walk your property and visualize where that coverage actually lands. Does it capture approaching footsteps, vehicle approaches, and package delivery zones? Adjust your choice or planned position if coverage gaps emerge.
Mounting hardware matters. Adhesive strips work on clean, dry glass, but they weaken in direct sun after 6–12 months. Small mounting brackets, secured with silicone adhesive or tiny stainless steel screws into the window frame, last longer. Test adhesive removal before committing: you don’t want it bonded permanently if you move. Reviews on platforms like CNET and Digital Trends often include real user feedback on mounting durability, worth checking before purchase.
Conclusion
Selecting a window security camera requires balancing resolution, power management, and strategic placement over chasing unnecessary specifications. Invest in a model with solid night vision, reliable connectivity, and mounting hardware that won’t degrade in a few months. Position it thoughtfully, covering the areas burglars actually target, not just the spots you’d naturally think to monitor. The best window security camera is the one you’ll actually maintain and that delivers footage you can act on when something matters.